How to set up a branded short URL with Buffer
If you use Buffer to schedule your social media posts, you’ve probably noticed that the URLs that you share are shortened to something like “buff.er/tktk” or “bit.ly/tktk.” Have you ever wondered if you could have your very own shortened URL that uses your personal or business brand name? Well, it’s something that you can easily […]
If you use Buffer to schedule your social media posts, you’ve probably noticed that the URLs that you share are shortened to something like “buff.er/tktk” or “bit.ly/tktk.” Have you ever wondered if you could have your very own shortened URL that uses your personal or business brand name? Well, it’s something that you can easily set up to use in your branding efforts on social media. We’ve created a simple guide to help you setup your own custom short URL on Buffer.
Step 1: Register the domain you’d like to use for your custom short URL
It’s important to note that you will only be able to use this domain for shortening URLs. For example, we couldn’t use Name.com for our URL shortener because it’s already being used to direct visitors to our website—instead, we use name.social, which is complementary but different. Using a unique domain ending like .SOCIAL, .LIVE, or .NEWS can be extremely helpful here for staying true to your business image while branding your social media presence.
Your short domain name needs to be 15 characters or less (including the dot and extension), or else your links won’t display your custom URL. You can register your domain at Name.com within a matter of minutes.
Step 2: Add DNS records
The next step to bringing your short URL to life is changing your DNS information. A DNS record is what makes a browser point to a website, so this is where you’re telling your custom short domain to point to Bitly. To update your DNS information, you’ll need to go to the website where you registered your domain name.
Updating your DNS records is typically pretty simple, and you can reach out to the registrar that you have your domain with for information on how to do it on their particular platform. We make it super easy at Name.com by pre-filling DNS templates for a variety of websites and apps, including Bitly.
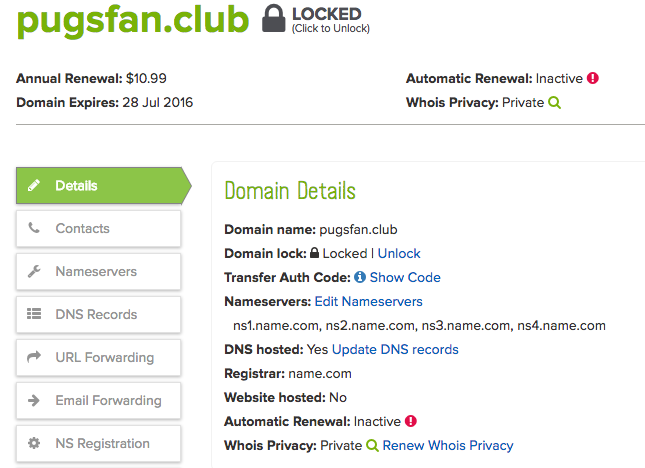
To update your DNS information on Name.com, log into your account, and choose the domain you’ll be using for your URL shortener from your list of domains. Then, go to the DNS Records page by choosing the tab on the left side or pressing the Update DNS records button.
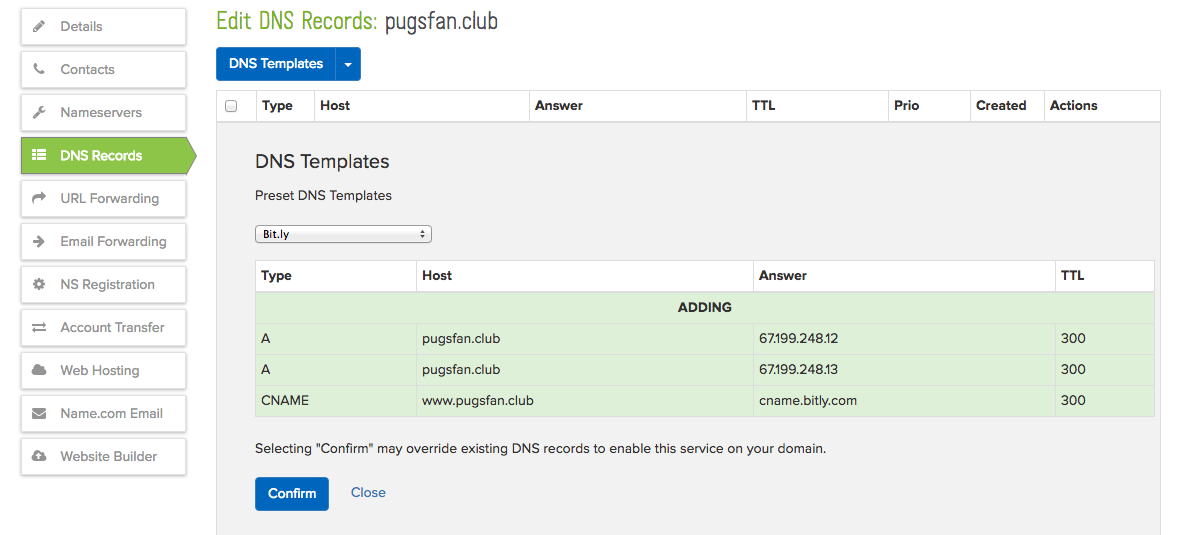
Once you reach the DNS Records page, press the DNS Templates button. Use the drop down menu that appears to choose Bit.ly (Choose the subdomain Bit.ly option only if your URL shorter will use a subdomain). The records you need will automatically be added, so just press the Confirm button to add the records.
Step 3: Add your domain to Bitly
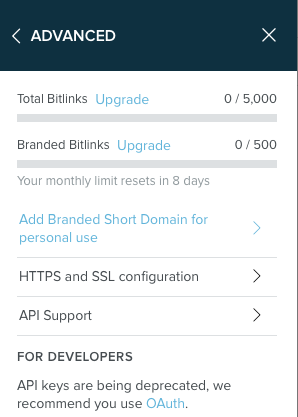
Next, you’ll need to sign into or register your account on Bitly. If you’re creating a brand new Bitly account, you’ll need to verify your email before you can continue on to the next step. Once you’ve logged in, navigate to Settings in the upper right pull-down menu and click the “Advanced” button (or click here.).
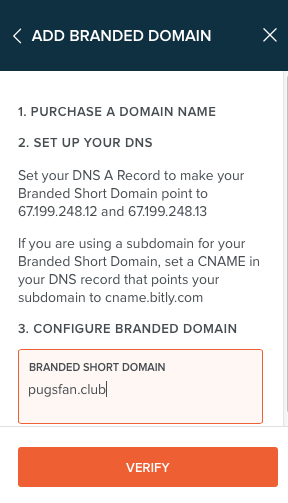
Select Add Branded Short Domain to begin your branded domain setup. Keep in mind that the free versions of Bitly accounts only allow shorteners for personal use—if you want to use one for your business you’ll need to upgrade your account.
Step 4: Verify your domain ownership
Enter the domain that you’re going to use for your branded short domain in the field. If you’ve correctly set up your DNS records, you’ll be able to complete setup by pressing the Verify button. Once you’ve done this, your domain will be connected to your Bitly account and your new domain will be used as the default domain for the links you create using Bitly.
Step 5: Pat yourself on the back
You’re now able to make your custom short URLs work on Bitly, but now let’s get to the fun part … making your custom URLs work on Buffer.
Step 6: Connect your Bitly account to your Buffer account
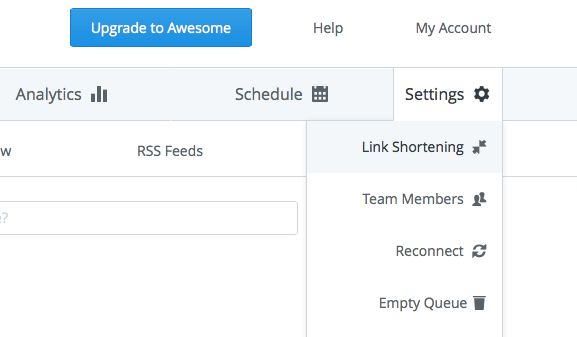
Head on over to Buffer, press the Settings button in the top navigation, and then click on Link Shortening button when the drop down menu appears.
Now that you’re on the Link Shortening page, press the Connect Bit.ly button.
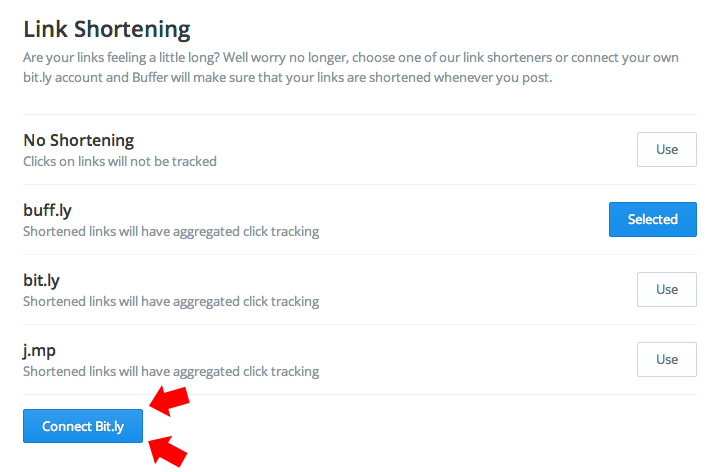
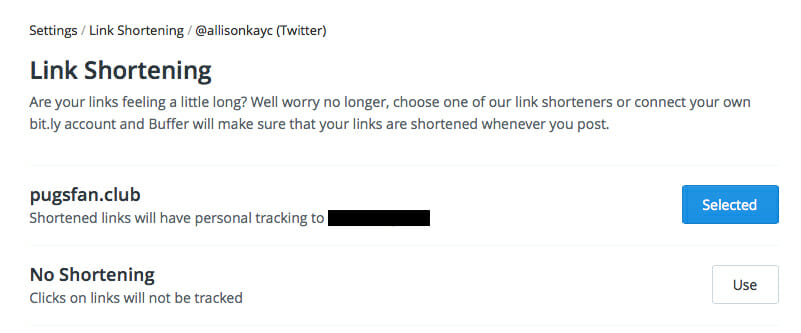
After you press the “Connect Bit.ly” button, follow the flow on the Bitly site to authorize Buffer to connect to your Bitly account. Once you’ve successfully connected Bitly to your Buffer account, you’ll be taken back to the Link Shortening page where you’ll see your custom URL displayed as selected.
Step 7: Give your custom short URL a spin on Buffer
Now that you’ve set up your custom short domain, you probably want to try it out. All you need to do now is head on over to the Buffer homepage where you schedule your updates, and then type in your message.
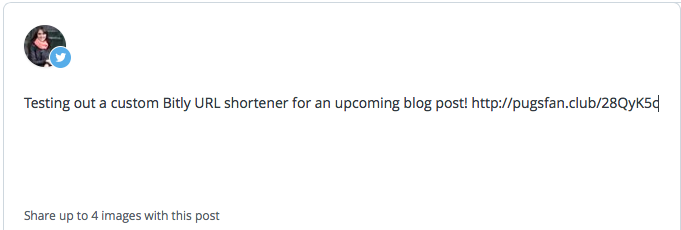
Press the Share Now button and see your beautiful new custom domain shortener in action.
You’ve successfully branded your URL shortener so that you’re promoting your brand every time you share something on social!

Dark mode
Let's keep in touch.
You can opt out at any time. By clicking “Subscribe”, you agree that you have read, understand, and consent to the Privacy Policy with regards to the use of your personal data