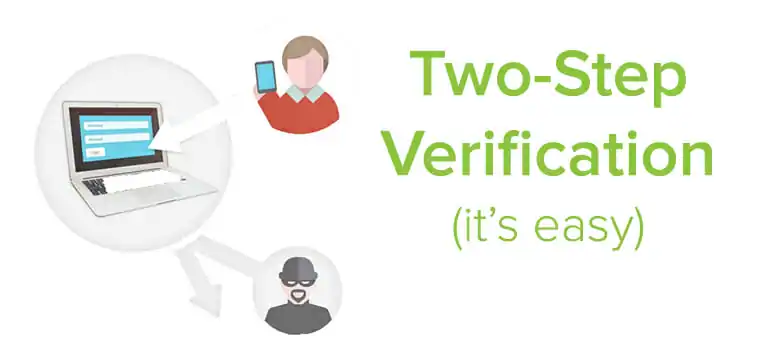
How to set up Two-Step Verification on your Name.com account
With the abundance of news about compromised cyber security and hacking schemes, it’s natural to want to take extra precautions to keep your online information safe. Two-Step Verification keeps your account extra secure by requiring a time-sensitive code in addition to a traditional login. As opposed to solely relying on a username and password, which can […]
With the abundance of news about compromised cyber security and hacking schemes, it’s natural to want to take extra precautions to keep your online information safe.
Two-Step Verification keeps your account extra secure by requiring a time-sensitive code in addition to a traditional login. As opposed to solely relying on a username and password, which can be guessed or figured out by an experienced crook, Two-Step Verification adds an extra layer of security.
Better yet, getting Two-Step Verification set up for your Name.com account is a simple task that can be done in a matter of minutes. Let’s walk through the steps.
1. Download a Google Authenticator app

There are several apps available based on the mobile device you use. Head over to your device’s app store and search for Google Authenticator to find one that suits your phone or tablet (we recommend Authy if you’re a desktop user). Have the app open on your device and within arm’s reach as you move on to the next step.
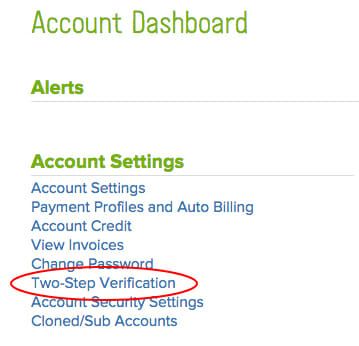
2. Log in to your Name.com account
Once you reach your dashboard, look under Account Settings and click the Two-Step Verification link.
You’ll be taken to a new page where you can start the process of adding a new credential to your account. Give your credential a nickname that will help you remember which device you’ll use to generate your security codes. Then, press Add Credential.
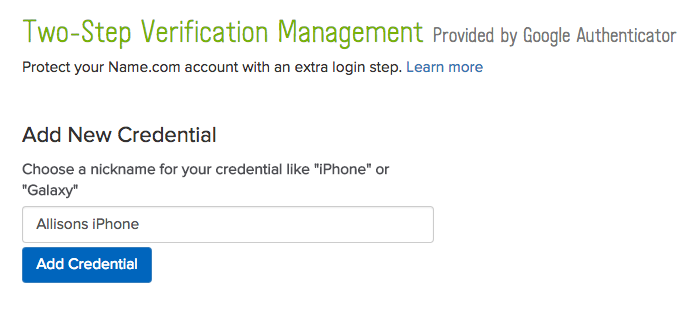
3. Setup a new credential
You’ll be taken to a page like this with a QR code.
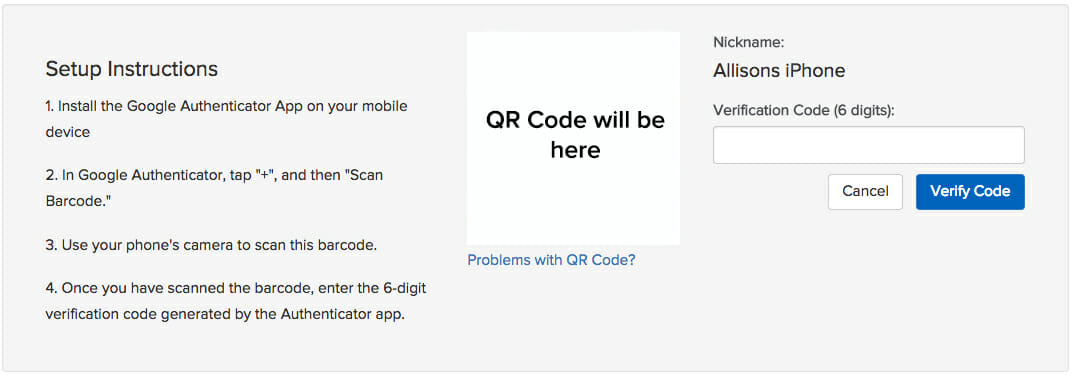
Now grab your mobile device! You should see a “+” button at the top of the Google Authenticator app. Press that, then select “Scan barcode” to start up your device’s camera. When the camera screen appears, hold it up to the QR code on your computer screen—it will scan automatically once it is lined up correctly.
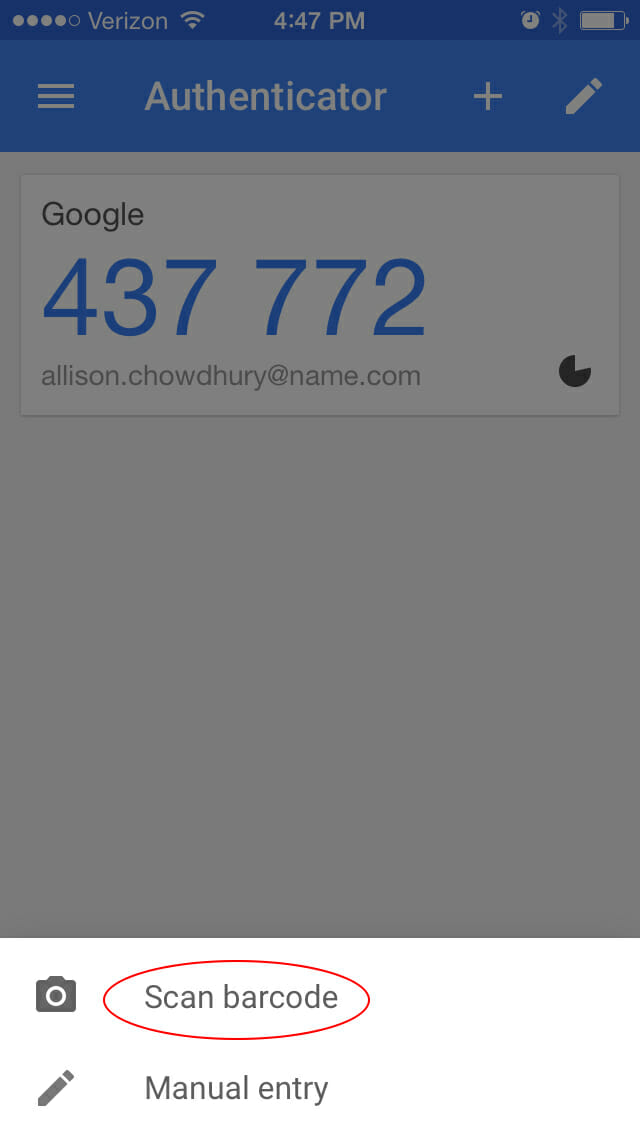
When the credential has been successfully added, a six-digit verification code will appear. Type in the verification code on your computer to finish setup. But make sure you do it quickly! You only have 30 seconds before the code times out and a new one is generated.
Keep in mind that your screen will only have one code if you’ve never used Google Authenticator before. If it says “Name.com” across the top, you’ve got the right one!
4. Finish and backup
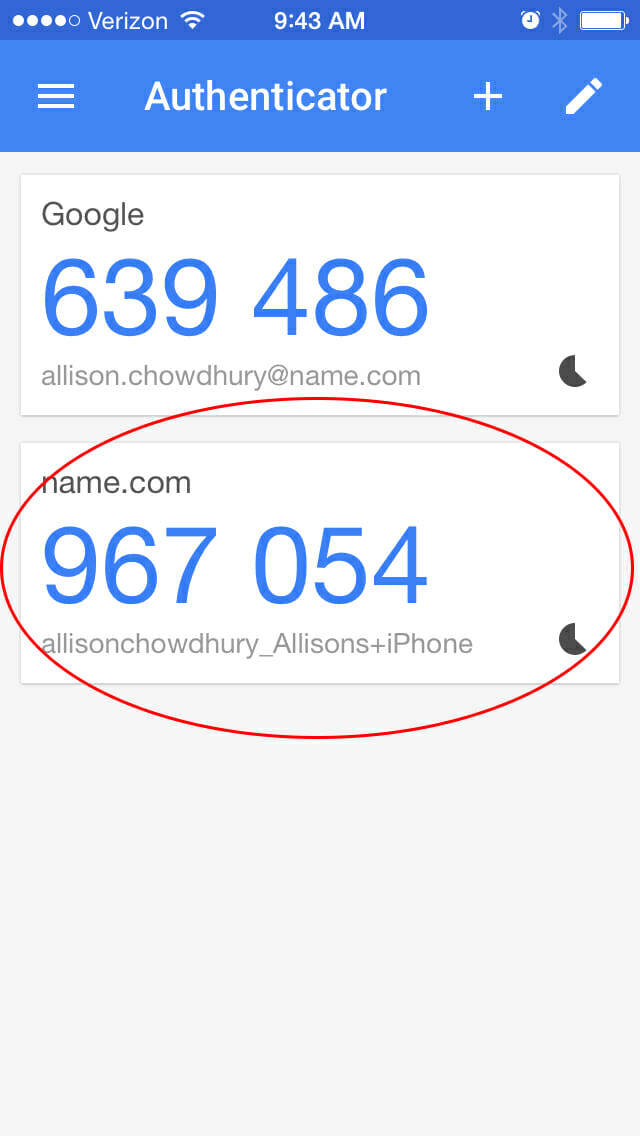
When your verification code has been successfully entered, you’ll be able to see your added credential on the Two-Step Verification page.

You also have the option of generating backup codes so you can still access your account if something happens to your mobile device. When you press the Generate Backup Codes button, a group of 10 codes will be created, each of which can be used one time. If you lose or break your phone, these codes are your ticket back into your account. Printing out a physical copy and storing it with your other valuable information is highly recommended.
5. Celebrate better security!
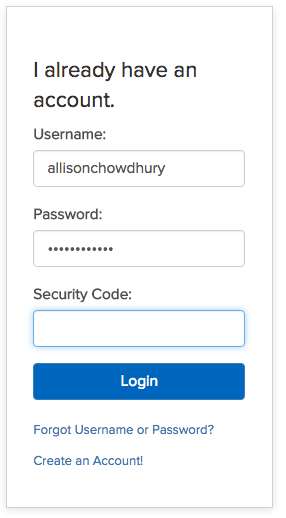
Once Two-Step Verification has been set up on your Name.com account, the login process will be a little different. After entering your normal username and password information, a new box will appear asking for a security code. Open your Google Authentication app and type in the randomly generated code to proceed.
If you still have questions about Two-Step Verification, you can learn more here. And as always, the awesome people in our customer support team are here to help you whenever you need it.
Dark mode
Let's keep in touch.
You can opt out at any time. By clicking “Subscribe”, you agree that you have read, understand, and consent to the Privacy Policy with regards to the use of your personal data