
Need a professional-looking email address but don’t want to deal with setting up and managing multiple email accounts? There’s an easy way to do it—and better yet, it’s free.
Email is one of the most common ways we communicate now, especially for business interactions. So if you’re still clinging to an old Hotmail address —the same one you use to send holiday e-cards to mom and dad and sign up for Bed Bath & Beyond coupons—you’re likely not putting your best foot forward if you’re using it for professional purposes.
Here’s where email forwarding comes in: It’s essentially an email mask that allows you to create a custom email address with your domain name that looks good but sends directly to your all-purpose inbox. Add to that the fact that it is completely free at Name.com and that takes less than 5 minutes to set up, and you have a win-win solution.
Although this address can only be used to receive emails, and can’t send them, it’s still a great solution if you want a quick, free way to look professional online.
How to set up a free professional email address
To get your custom email address set up, you’ll need a domain at Name.com. Use your business or personal website address, or register a new one that is relevant to your profession or interests.
Once you choose the domain you’d like to use, head to our Forwarding Tools page. You’ll have to be signed into your Name.com account to continue on to the next step.
Next, choose from the drop-down menu to select the domain you’d like to use to create your custom email address. The domain you choose will go to the right of your at sign (@) in your new email.
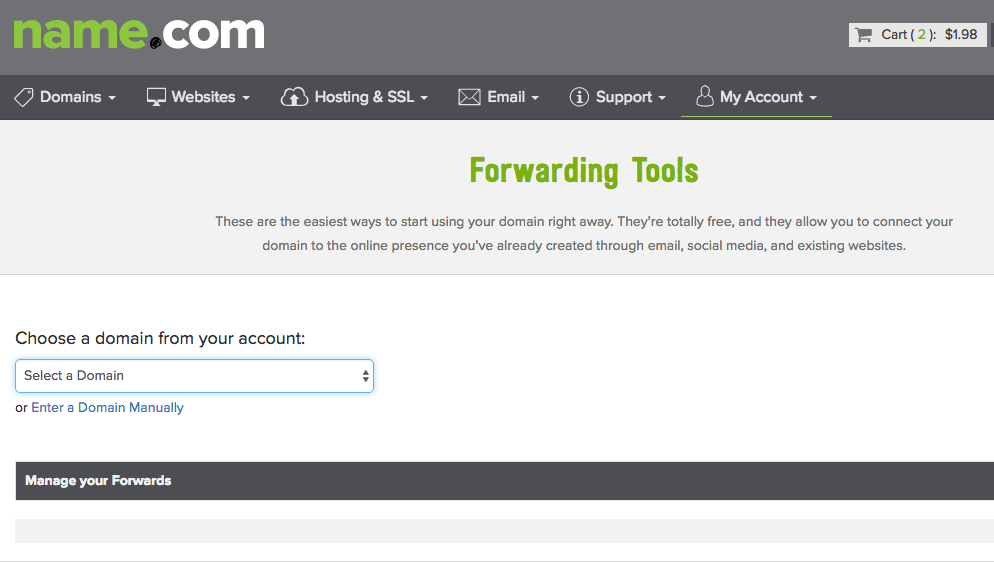
One the domain is selected, a new field will appear below. Scroll to the bottom of the page and press the New Email Forwarding button.
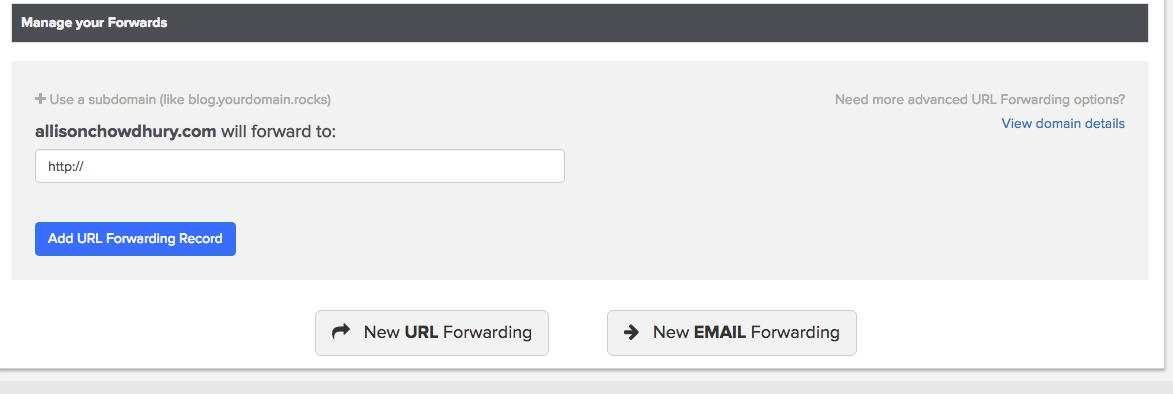
Now, choose what your custom domain name will be. This is the email address you will give to your business contacts of website visitors so they can get in touch with you. In the field next to it, enter the email address that you want emails to be forwarded to (this should be a personal or work email address that you already own and have access to). Press the Add Email Forwarding Record button when you’re finished.
Your forwarding record has now been created, and can be edited or deleted at any time. Now, you can create a professional impression when talking to clients or website visitors without having to shell out any extra cash.
If you run into any problems setting up your forwarding email, refer to this Knowledge Base article to troubleshoot the problem.
Dark mode
Let's keep in touch.
You can opt out at any time. By clicking “Subscribe”, you agree that you have read, understand, and consent to the Privacy Policy with regards to the use of your personal data