
Setting up a NIP-05 Identifier for your NOSTR profile
What is NOSTR?
The simplest explanation is that it is a social networking protocol that helps create a censorship-resistant global “social” network. Think HTTPS for browser clients or IMAP/IPOP for email clients. You can choose your favorite client for a browser (chrome, firefox, brave) and still access the same websites from any. Similarly, you can use your favorite email client (gmail, outlook, titan) and send/receive emails regardless of what you use to read or write said emails. NOSTR is this same concept, but for social media. It is a decentralized alternative to products like Twitter, however the protocol can be used for various applications.
Check out the Github project to learn more, and see ongoing projects: https://github.com/nostr-protocol/nostr
What is NIP-05 Verification?
Think of this as the blue checkmark you see on Twitter or Instagram. On these centralized platforms the controlling company needs to “verify” your account based on their specs. This may be based on follower count, subscription fee, or a variety of other variables. With NOSTR you can verify yourself. Some users have set up services for those who want to be verified, but you can easily do this yourself with your personal website. Not only is this very cool, but it also makes it much harder to impersonate.
This helps other users know that you are who you say you are. Your verified handle allows people to know it is the real you, while also providing more information and context on who you are and what you do (e.g portfolio, blog, ecommerce store, etc.).
So how do you get verified?
Before we explain the “easiest” way to get verified for free; if you already have a website with content on it, you simply need to do steps 3-5 at your root directory and step 12 on your NOSTR client (e.g. Damus). If you use cPanel, shared hosting, cloud hosting, etc. you likely have practice with your website file structure, so it should be fairly easy.
If you just want to be verified but don’t have a website with content yet, this guide is for you. In this guide we use Github pages.
- The first, and most fun step is to get a domain! Be creative and pick whatever you want. In my case, I wanted a personal brand. I plan to start a blog and sell some products, so I went with “armadalabs.studio”.
This is where Name.com can help – we are currently having a large domain sale for the NOSTR community on a large subset of Identity Digital domains. The promo code “NOSTR” will be auto applied when you search from www.name.com/
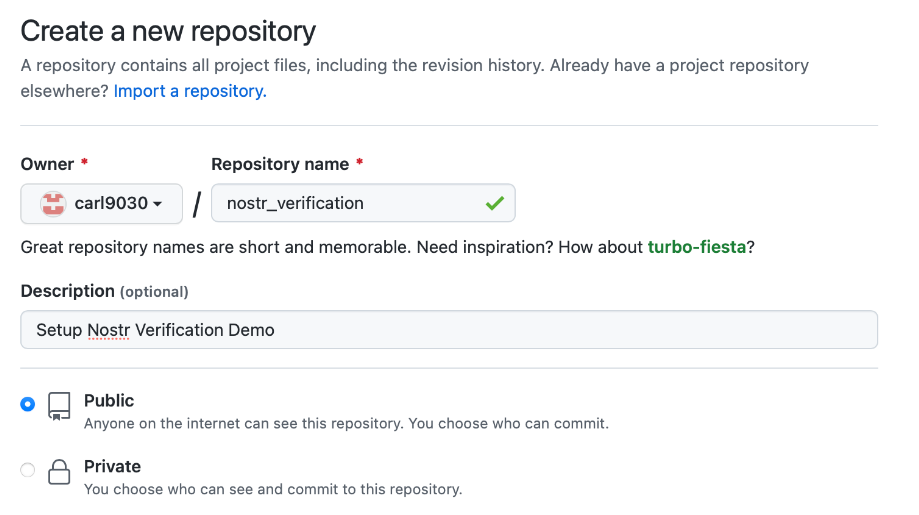
- Create a new Github repository (If you do not have a Github account, you can create one for free: github.com):
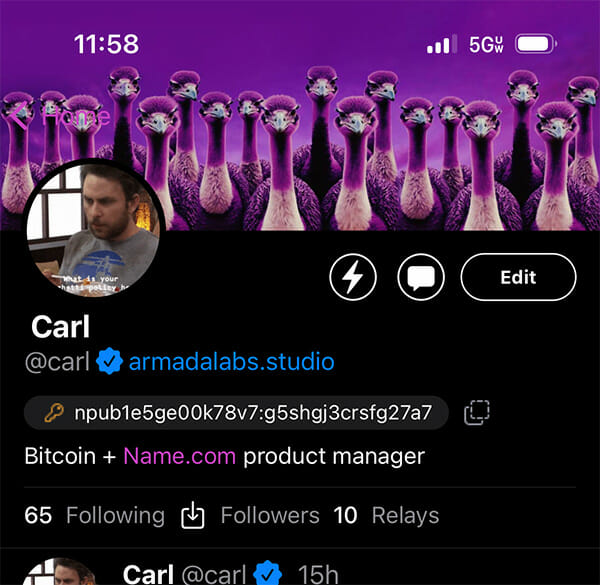
- From your NOSTR client, retrieve your public key. Each client may store this in a slightly different place. I am using Damus, and it can be found on your profile page or in your settings.

- If you have a Damus key, like I do, you need to convert it to traditional hex for NIP-05 to work. You can do that here: https://damus.io/key/
- With the handle/name I want, and my public key in hex format, I am ready to make my verification file.
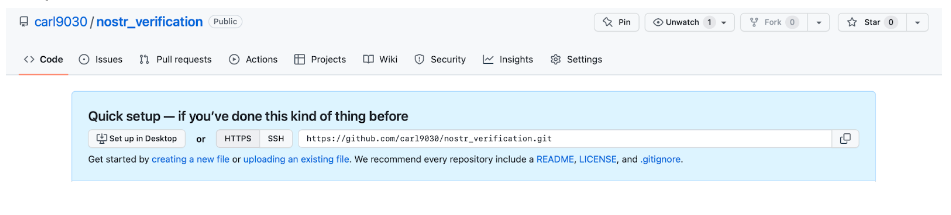
Go back to GitHub, and in your new repo, click the link, “creating a new file” in the quick setup section.
Your new file name will be “nostr.json”, and will be placed in the directory “.well-known”. You can type this at the top of your new file by typing “.well-known/nostr.json”

{
“names”: {
“<name>”: “<pubkey>”
}
}
Once complete, scroll to the bottom and click “commit new file”.
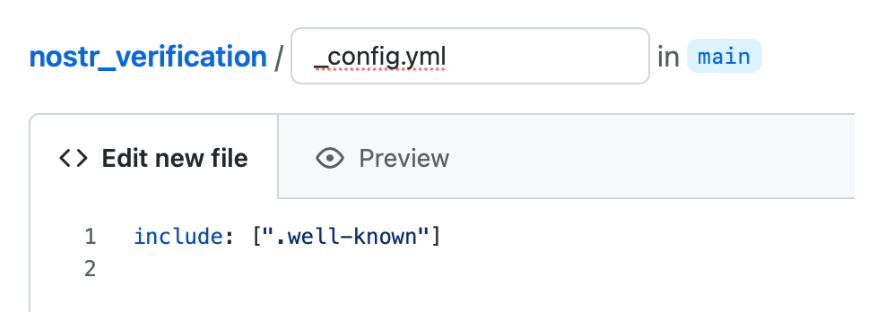
- Go back to your GitHub repo main directory and you will now see the “.well-known” directory you just created. To tell GitHub to include this directory when it builds your webpage, you need to have a _config.yml file.
Click “add file” – name it _config.yml and paste “ include: [“.well-known”] “ into the file as shown in the screenshot below:
Scroll to the bottom and commit this new file.
- Now it is time to connect your custom domain! Back at Name.com, go to your new domain. This can be found in the “My domains” section, and click on the domain you want to use to access the domain management page.
Once you’re on that page, click “Manage DNS Records”
Name.com makes it super easy to add the correct DNS records. Click on DNS templates, and in the drop down find “GitHub Pages”. From there, click “Update DNS Records” and voila! The correct A records have been added to your custom domain.

- Back on GitHub, on your repo, click settings and on the left side menu click “Github Pages”.

- Deploy the website – Source: “Deploy from a branch” and Branch: “main – /root”, click “Save”
- Add your custom domain name and click save, and if not already checked, click “enforce HTTPS” as seen in the image below:

- To check that it worked you can navigate to that file in a browser and see the content: https://armadalabs.studio/.well-known/nostr.json
Just replace my custom domain with yours to check.
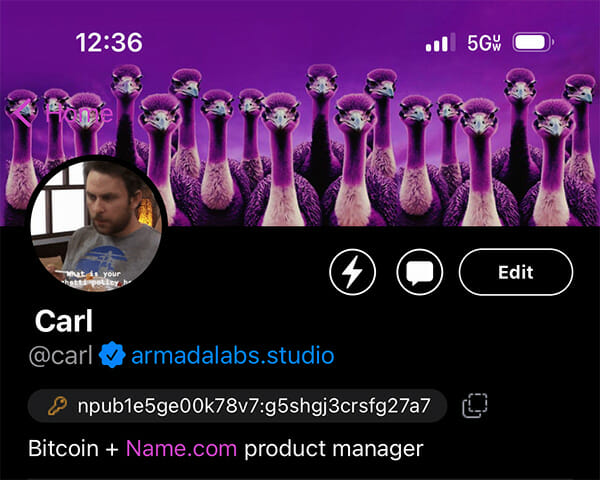
- The final step! In your NOSTR client (in my case, damus) – navigate to your profile settings and in the “NIP-05 Verification” box type the handle/name you used, followed by your custom domain. In my case it is “carl@armadalabs.studio”

Click save and reload the profile page (sometimes opening and closing the app will help). Your verified handle should appear with your custom domain now! In this guide, I am showing the Damus.io client (still in beta as of today). However, this verification will work and appear on other NOSTR clients.
*Featured image credit to Twitter account @Nostr_Ostrich
Dark mode
Let's keep in touch.
You can opt out at any time. By clicking “Subscribe”, you agree that you have read, understand, and consent to the Privacy Policy with regards to the use of your personal data