Congratulations! You purchased your very own domain from Name.com. Now you have a fully functioning website and you’re ready to get started … right?
Slow down there speed racer! Although your newly purchased domain is all yours, there are still a couple steps you need to take to get your website up and running. Luckily, there are plenty of options available for quickly and easily linking an existing website or setting up a new one.
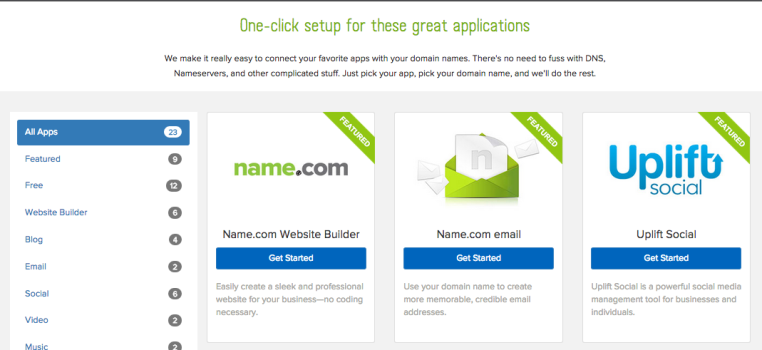
When you head on over to Name.com Apps, you’ll see just how many options you have for setting up a site. Whether your preferred platform is Blogger, Facebook, SquareSpace, or something else, setup is typically just a click away.
For this blog post, we’ll focus on linking an existing website or social account to your newly purchased domain (I promise it’s totally easy).
Connecting your domain to an existing Tumblr site
Let’s say you’ve dedicated endless tears, sweat, and hours on your masterpiece of a Tumblr site: Moustache Mania. After years of scouring the web for the most fabulous facial hair, you’ve decided to take your beloved website to the next level by purchasing a custom domain. Thus, moustachemania.social is born and you’re ready to get rolling.
(Tumblr is also a great free option if you’re creating a new site from scratch. The steps for connecting your domain are the same.)
Now that your shiny new domain name has been purchased, how do you get your content from one place to the other? Start by logging into your Name.com account and heading over the the App Store from the Websites tab. From there, scroll through your options until you find the social media account you would like to link. Then, press Get Started.

You’ll end up on this screen, where you can select which domain you would like to link. You can also designate a subdomain at this time if you would like (e.g. blog.moustachmania.social). When you’re happy with your selected domain, press Complete Setup.
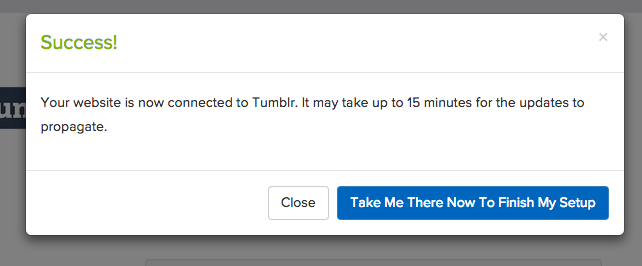
You’ll see a message like this when your domain has been successfully linked to your social account. But wait—you’re not done quite yet! Use the Take Me There Now button to head over to your social profile and complete the setup.
While the next steps will vary based on the social account you would like to link to, most will be pretty similar across the board. When linking a Tumblr site, click the Account icon and select the Tumblr account you would like to link.
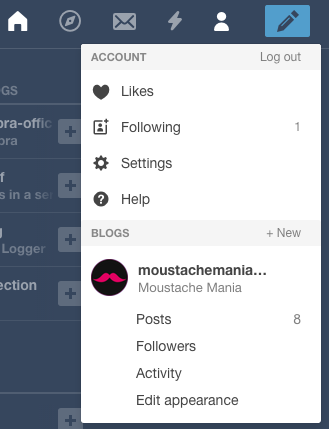
Press Edit Appearance and scroll down to the Username section. Then, press the pencil button on the right side to edit the section. Once the drop down section appears, turn on the slider for “Use a custom domain.” From there, you can enter your newly registered domain URL. Use the “Test domain” button to ensure that your site has been successfully linked.
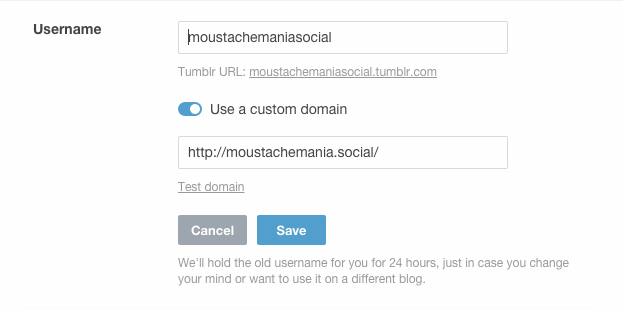
Pro Tip: Did you set up a subdomain earlier? Make sure it matches the URL you put in the custom domain section!
Once you’ve pressed Save, type in your New Domain URL to give it a try—your website should be successfully linked.
Name.com Apps makes it easy to get your website up and going. Whether you are linking to an existing site or starting from scratch, our platform makes website set up a breeze.
Dark mode
Let's keep in touch.
You can opt out at any time. By clicking “Subscribe”, you agree that you have read, understand, and consent to the Privacy Policy with regards to the use of your personal data