Set up Your Store (v8 & v10)
Last Updated: June 20, 2024
Set up an Online Store in Website Builder and learn how to add Payments and Products.
Follow these steps to get your store up and running quickly
Click the Store icon
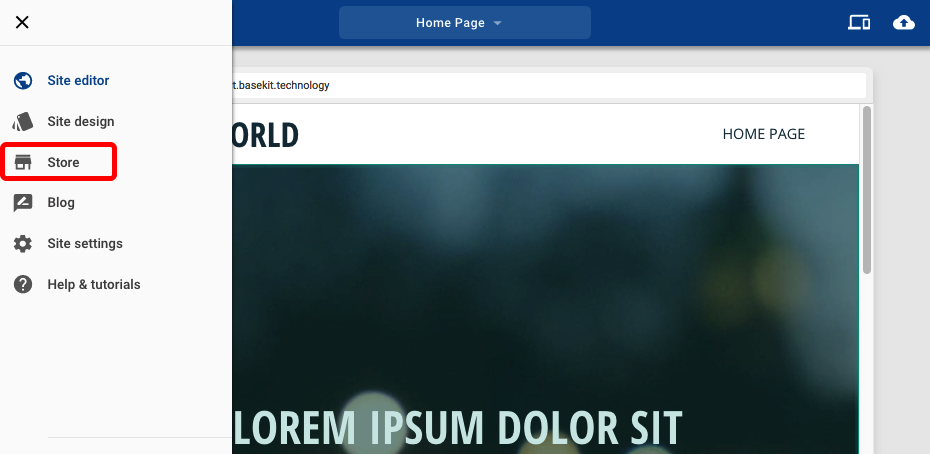
Store icon
The first time you visit the store page it will show you the Store setup window to guide you through the setup process
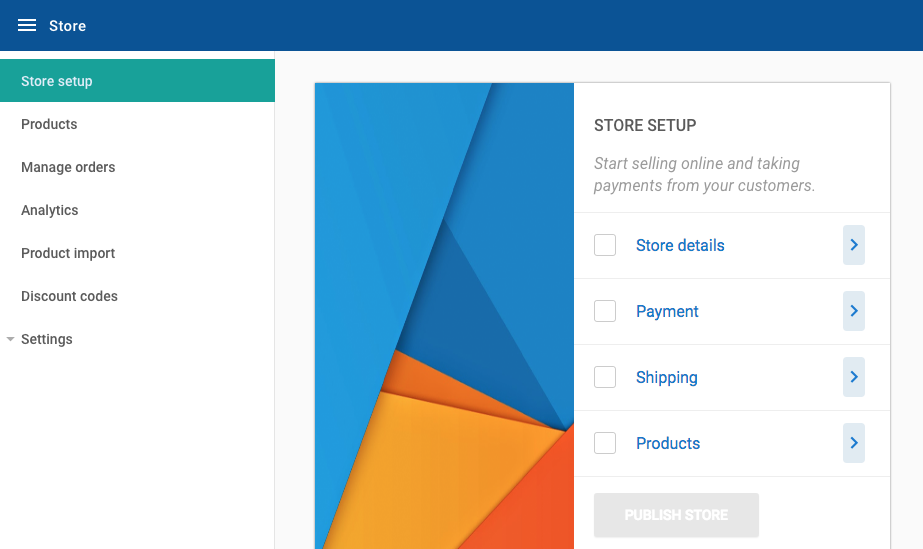
Store setup
Basic information
Click Add basic information. This will take you to a page where you can add essential information about your store and you will need to make sure this is as complete as possible. Once you have filled in the relevant fields click the Save button to return to the setup process
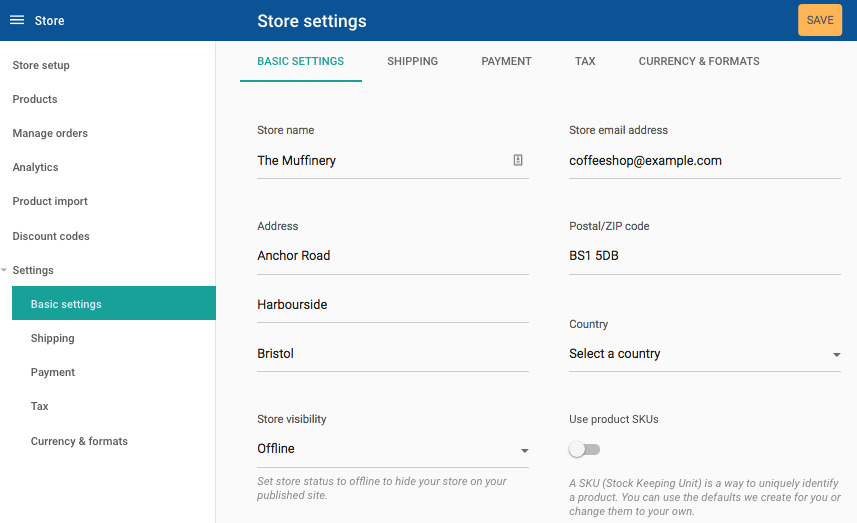
Store settings
Add a payment method
In order to accept payments from your customers, you will need a payment method set up. There are a number you can choose from.
Click Add a payment method. On this page you will notice a list of third-party payment gateways that you can use. Pick a method that is appropriate for your business and follow the instructions provided. After you have successfully configured the payment gateway, you will be redirected to the setup process
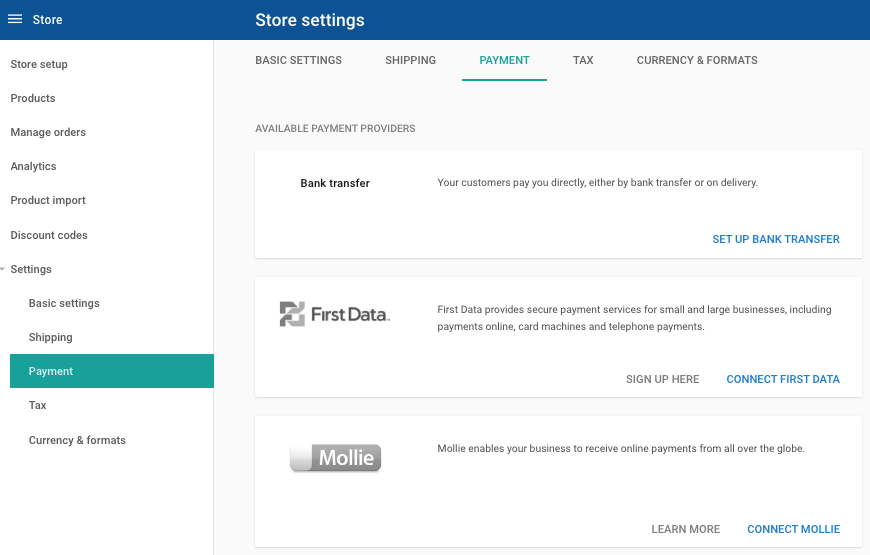
Payment setup
Which payment method should I use?
If you are unsure which payment method you should use, please refer to Take store payments
Add a shipping option
Before you can send products to customers you will need to specify one or more shipping options
On the store page, click the Shipping rate tab and then click the Add a shipping rate button
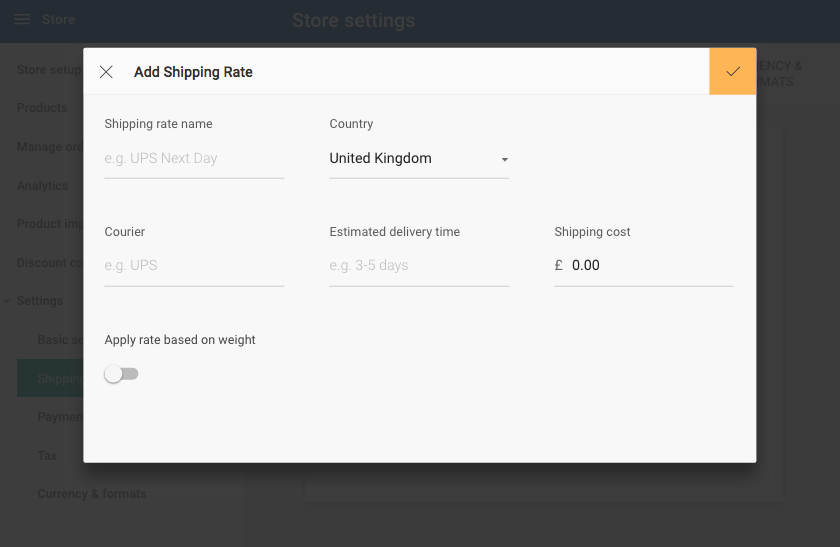
Add a shipping rate
Shipping options explained
Shipping rate name - The name you provide here will be seen by customers using your website during the checkout process
Destination country - The country which this shipping method applies to
Courier - The name of the courier you will be using to send goods
Estimated delivery time - The amount of time it will take for the goods to reach the customer
Shipping cost - The amount to charge the customer for using this shipping method. Set to 0 if this shipping method is free
Apply rate based on weight - Enabling this option will allow you to charge shipping for an item that is within a specified weight range
Add your first product
The final thing to do before you can take your store online is to add one or more products, to do this click the Add products option from the store setup checklist. More information about adding products can be found in the Adding products document. Once you have added your product click the Save button and return to the Store setup option from the left-hand menu.
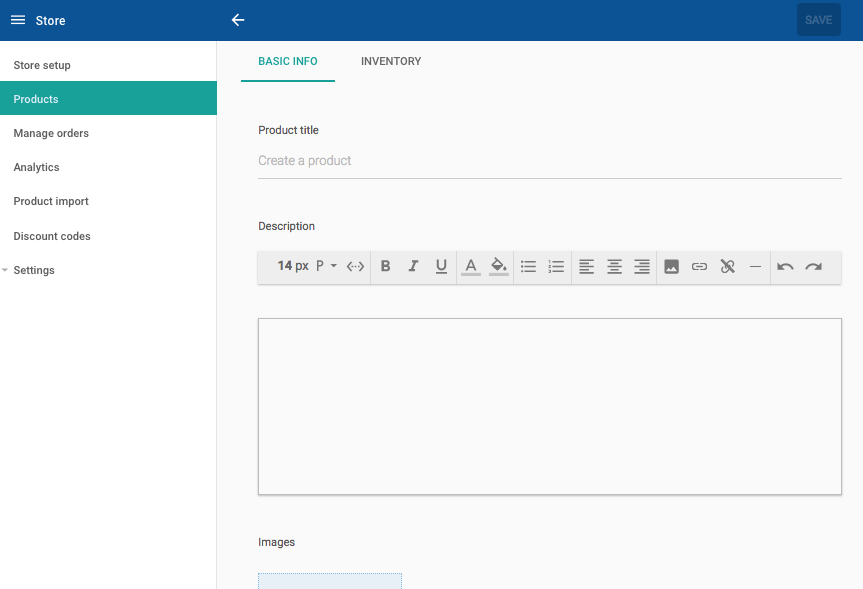
Add product
Publishing your store
Now that you have applied settings to your store and added products, you can take it online. By default, your store will be in offline mode until you choose to publish it. To do this, click the Publish store button from the Store setup checklist. Once completed, your store will be online and visitors will be able to order products.
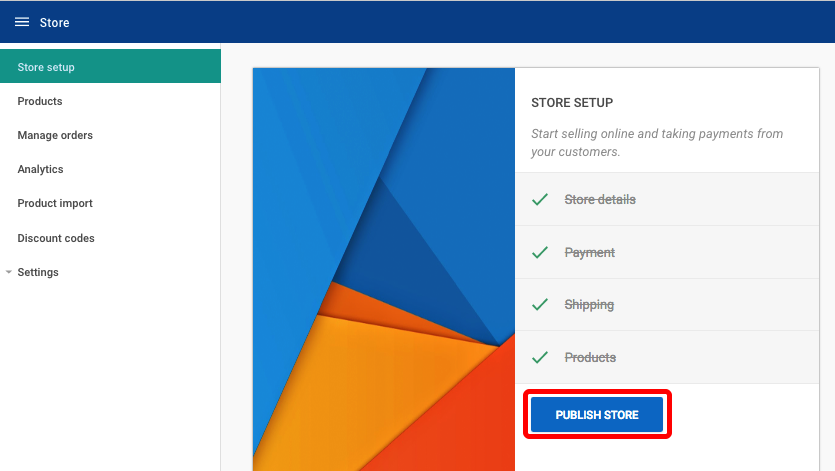
Publishing your store
Changing store status
If you want to take your store offline, use the Settings > Basic settings page. All of your content and settings will be retained but your store will no longer be visible on your website.
NOTE: In order to setup a store you need to have the Business tier of our product. You can view the comparison at name.com/website-builder.
Click on the Main menu icon and then click Store
The first time you visit the Store page it will show you the Store setup window to guide you through the setup process

Store setup
Basic information
Click Add basic information, this will take you to a page where you can add essential information about your Store, you will need to make sure this is complete as possible. Once you have filled in the relevant fields click the Save button to return to the setup process

Store settings
Add a payment method
In order to accept payments from your customers you will need a payment method setup, there are a number you can choose from
Click Add a payment method, on this page you will notice a list of third-party payment gateways that you can use. Pick a method that is appropriate for your business and follow the instructions provided. After you have successfully configured the payment gateway, you will be redirected to the setup process

Payment setup
Add a shipping option
Before you can send products to customers you will need to specify one or more shipping options
On the Store page, click the Shipping rate tab and then click the Add a shipping rate button

Add a shipping rate
Shipping options explained
Shipping rate name - The name you provide here will be seen by customers using your website during the checkout process
Destination country - The country which this shipping method applies to
Courier - The name of the courier you will be using to send goods
Estimated delivery time - The amount of time it will take for the goods to reach the customer
Shipping cost - The amount to charge the customer for using this shipping method, set to 0 if this shipping method is free
Apply rate based on weight - Enabling this option will allow you to charge shipping for an item that is within a specified weight range
Add your first product
The final thing to do before you can take your Store online is to add one or more products, to do this click the Add products option from the Store setup checklist. More information about adding products can be found in the 'Getting started 2: Adding products' document. Once you have added your product click the Save button and return to the 'Store setup' option from the left-hand menu.

Publishing your store
Now that you have applied settings to your Store and added products, you can take it online. By default, your Store will be in offline mode until you choose to publish it. To do this, click the Publish Store button from the Store setup checklist. Once completed, your Store will be online and visitors will be able to order products.

Publishing your store
Note: If you want to take your Store offline, use the Settings > Basic settings page. All of your content and settings will be retained but your Store will no longer be visible on your website.