
If you’re like us, you’re never exactly thrilled to spend your valuable time renewing domains, updating settings, and figuring out when your next expiration date will be. However, there are a few Name.com account settings that can make your domain management more of a pain-free process.
Enable automatic renewal

Have a product or domain that you know you don’t want to expire any time soon? Switch on automatic renewal and it’ll be automatically renewed once your expiration date approaches—meaning you avoid the risk of forgetting and having your website go down or your domain snatched up by someone else. To enable automatic renewal for select products and domains, you can manually manage them from the My Domains and My Products menus. Or, head to the Billing and Renewal Center and select Turn All On under the Automatic Renewal Settings heading.
Enable automatic Whois Privacy
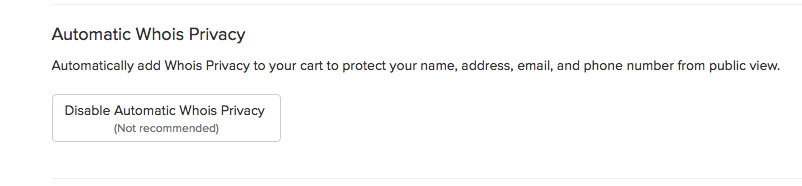
When you’re speeding through checkout after purchasing a domain, it’s easy to forget that Whois Privacy is a necessary and highly worthwhile product that you should purchase for every domain you have. We’ve added a default setting that automatically adds Whois Privacy to your purchase when you register a new domain—and we highly suggest that you keep that setting on! It’ll save you a whole lot of headaches later on by preventing your information from being exploited by undesirable folks on the internet.
Sync your expiration dates
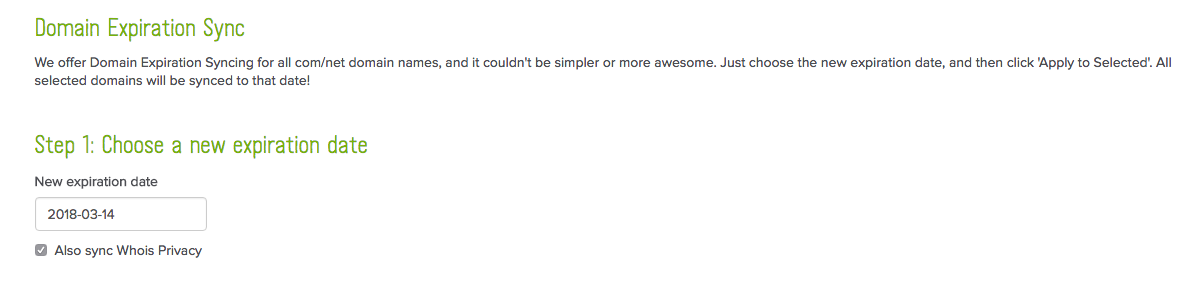
If you prefer to manually renew your domains, syncing their expiration date can mean less work for you. To do so, choose the Sync Expiration Dates option from the My Domains option when you’re logged into your account. You’ll be able to choose a single expiration date of your choice for all of your eligible domains. Although this option only is available for select TLDs, it’s still worth taking a look at if you have a large portfolio of domains.
Set your default nameservers
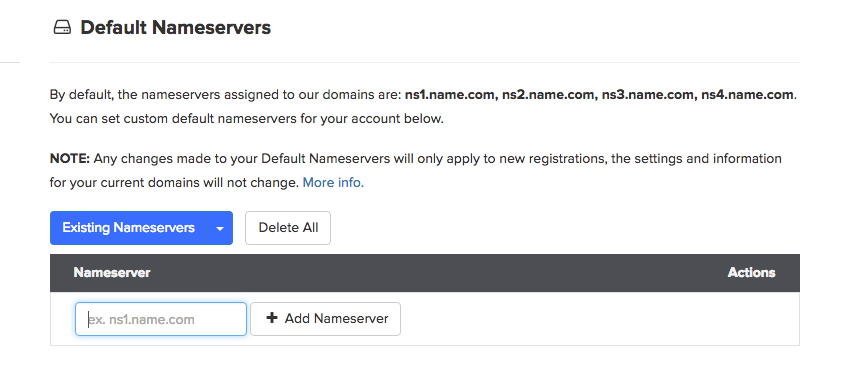
We automatically assign Name.com nameservers to your domains as a convenience, but if you host your website elsewhere, it can get old switching those records every time you set up a new site. But if you head to your account settings and choose Default Nameservers from the menu on the left, you can assign your own nameservers that will be automatically used going forward.

Dark mode
Let's keep in touch.
You can opt out at any time. By clicking “Subscribe”, you agree that you have read, understand, and consent to the Privacy Policy with regards to the use of your personal data