
As of the beginning of July 2018, cPanel introduced a new update that added an extra layer of security to its users’ hosting accounts. When accessing SFTP, you are now required to enter an SSH key in addition to your username and password.
If you are having trouble with your secure FTP access, and have not already generated an SSH key, you’ll need to do so before you can regain access—here’s how.
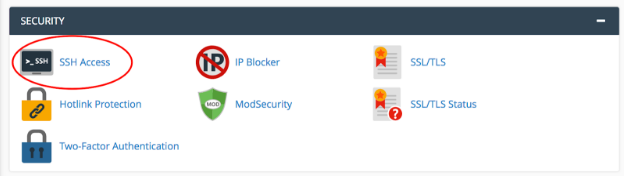
Start by logging into cPanel. Under the security tab, choose the SSH Access link.
Click on the Manage SSH Keys button. This is where you’ll be able to add and delete various SHH keys. From here, you’ll be able to generate new keys.
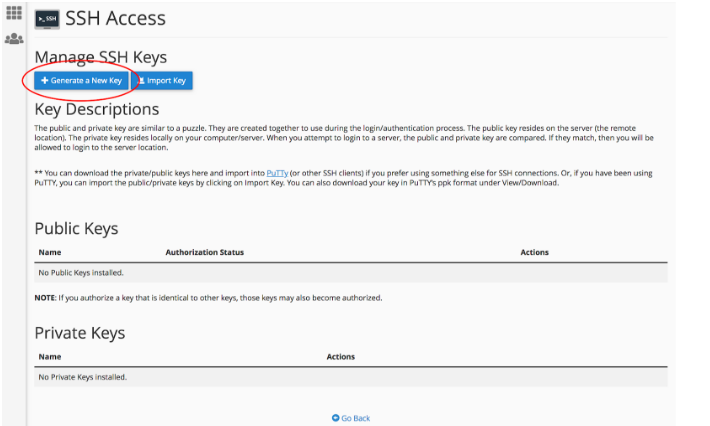
You’ll notice that both Public and Private keys can be generated. Most people can access SFTP via the Private key but the Public key may be necessary for some FTP clients. But don’t worry—the process of generating one key will automatically initiate the other, so this tutorial should work for both (and you can always reach out to our support team if you run into any trouble).
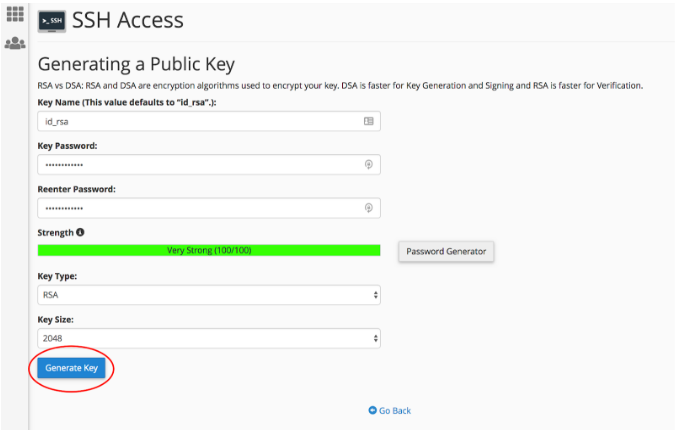
The first thing you’ll need to do when generating a Public or Private key is create a password for it. While you’re free to customize your own, we recommend using the Password Generator to create something that is super secure. You’ll need to have that password later, so make sure that you write it down, memorize it, or store it in a password keeper like LastPass. Once the password has been set, you can continue on to generate the key.
When the green banner appears, confirming that you have successfully created a key, use the navigation buttons to go back to the main SSH Access page. You’ll notice that your newly created key is not authorized. Press the Manage button to authorize it. Once you’ve confirmed that the key is authorized, head back to the main page once more.

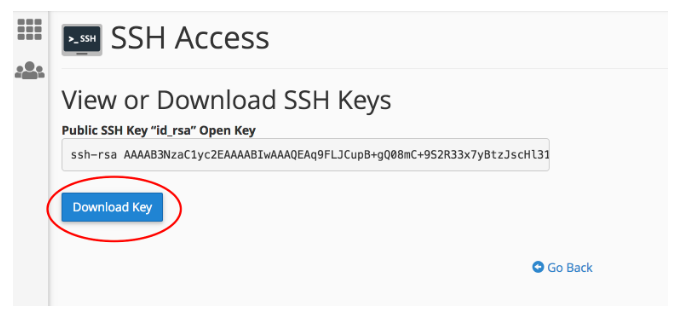
Once the authorization status reads, “authorized”, you’ll be able to download either the Public or Private key or both. If you’re not sure which key you need, it’s better to be safe and download both. While the download prompts for Public and Private keys will look different from one another, all you need to do to access them is click the Download Key buttons.
Once those keys have been generated and downloaded, keep them on hand for setting up access with your FTP client. If you need help from there, you can reference this Knowledge Base article.
Dark mode
Let's keep in touch.
You can opt out at any time. By clicking “Subscribe”, you agree that you have read, understand, and consent to the Privacy Policy with regards to the use of your personal data