
Hosting tends to be one of the bigger, scarier parts of starting a website—but we’ve worked to make it as simple and unintimidating as possible. In this post, we’ll go over one of the most basic parts of setting up hosting: Pointing one or multiple domain names at Name.com hosting.
Pointing a new domain to Name.com Hosting

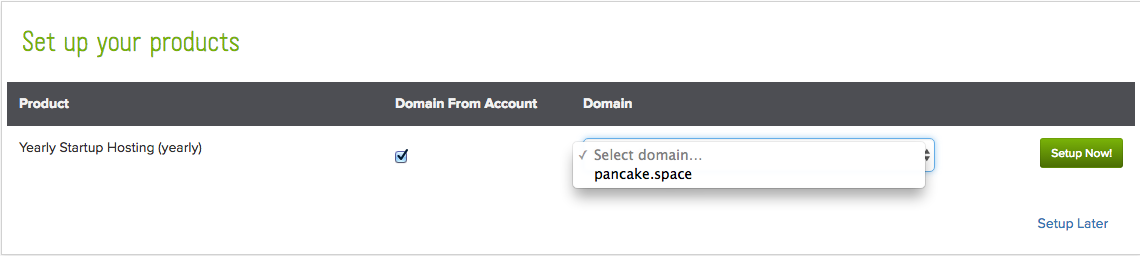
If you’re considering Name.com Hosting and you haven’t purchased the domain you’re planning to use for your website, you’re in great shape! Why, you ask? Because all of our Name.com Hosting plans include a free domain name when you first purchase your hosting plan. This is also the simplest method for pointing a domain toward your hosting plan because we’ll automatically add the DNS records for you during setup. Click the Setup Now button and wait for about 15 minutes as your details cache. Once that’s done, you can start setting up your website.
Pointing an existing domain to Name.com Hosting
If you already have a domain, but still need hosting, you can easily set that up as well. Once you’ve purchased your hosting plan, you’ll need to manually add the correct DNS records to the domain you plan on using. Log into your Name.com account and choose Web Hosting under the My Products menu. Select the domain name you want to set up hosting for in the Currently Managing tab, then click the blue DNS Templates button. Choose hosting from the drop-down menu that appears and the records will be automatically set up. However, if the domain name you’re using is not registered with Name.com, you’ll need to go to your other registrar and ask them to change the domain’s name servers to:
- ns1.name.com
- ns2.name.com
- ns3.name.com
- ns4.name.com
Adding additional domains to Name.com Hosting
If you choose the Namebuilder or Unbelievable web hosting option, where multiple websites are supported, you can add additional domain names to your hosting plan. You’ll need to log into cPanel (which can be accessed through the Web Hosting Dashboard) and choose Addon domains from the Domains section. Type the domain name into the entry field and the subdomain/FTP username and Document root will autofill. Enter and confirm your password to finish.
Have more hosting questions? Check out our Knowledge Base, where you can find tutorials on cPanel, FTP troubleshooting, and other roadblocks.

Dark mode
Let's keep in touch.
You can opt out at any time. By clicking “Subscribe”, you agree that you have read, understand, and consent to the Privacy Policy with regards to the use of your personal data